Environments
Environments represent the target deployment stages for your API Catalogs (e.g., Development, Staging, Production).
Deployment Target
An Environment is the link between a Catalog and a Revision. It defines which version of your API is currently "live" for that specific stage.
Key Attributes
- Shortname: Used in the public URL (e.g.,
/prod/,/dev/). - Base Path: An optional prefix added to all endpoints in this environment.
- Current Revision Id: The UUID of the published revision that is currently active.
The Deployment Process
To deploy to an environment, apply a Revision to it. This links a specific version of your API configuration to that stage.
"Environment Production for Catalog Payments is now running Revision v2.1.4"
How It Works
The environment shortname becomes part of the public URL for your APIs. For example, an environment named prod for the payments catalog would serve traffic at a URL like /acme/payments/prod/....
UI Usage Guide
Follow these steps to create and manage environments.
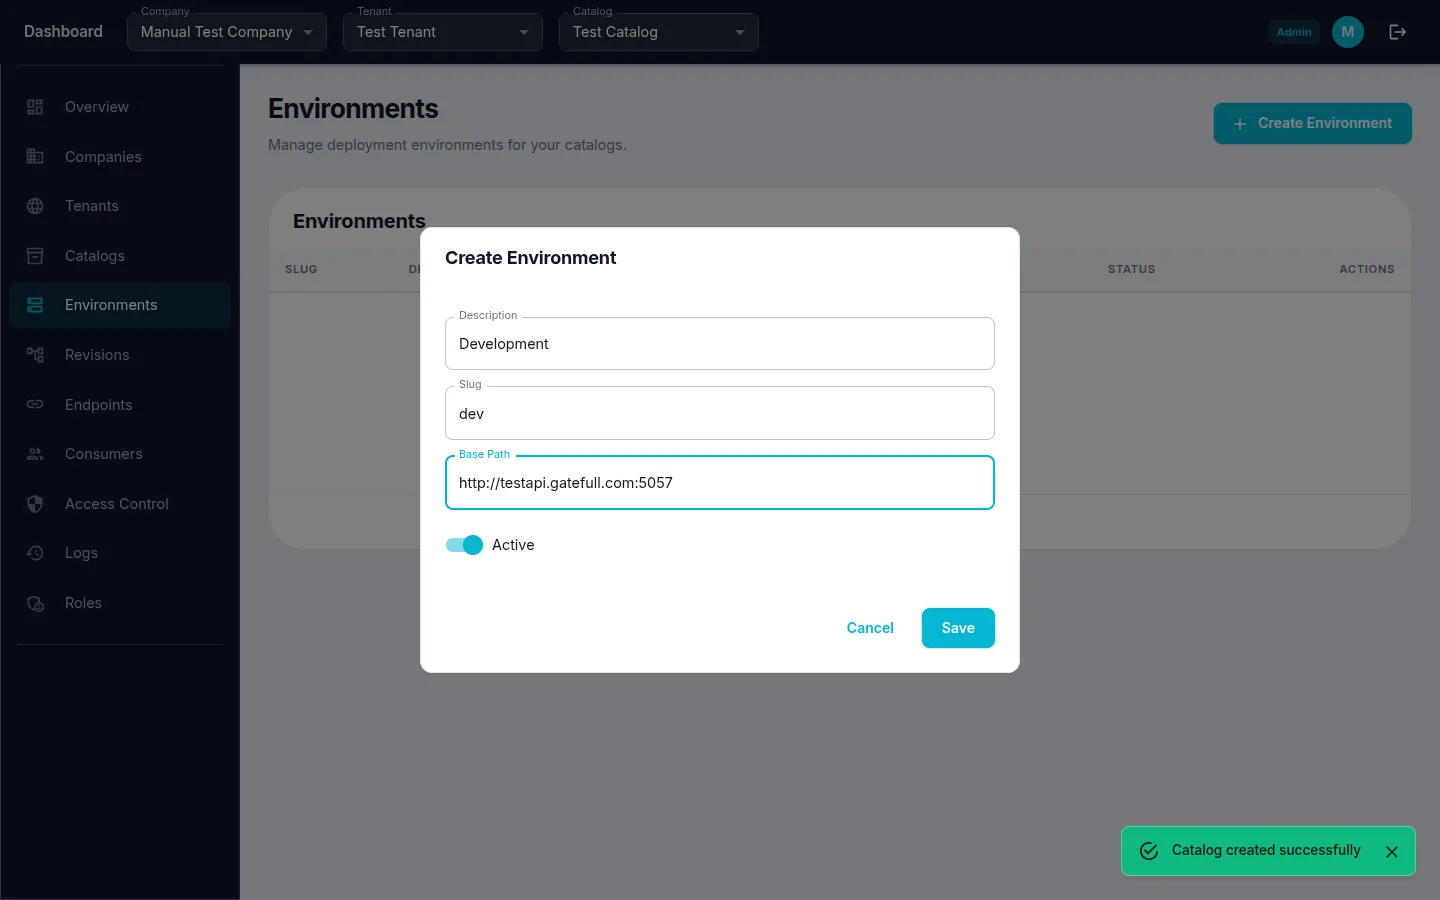
Step 1: Create an Environment
- Navigate to Environments from the sidebar menu.
- Click the "Create" (or "+") button.
- Fill in Description (e.g., "Development"), Slug (e.g., "dev"), and Base Path with your upstream server URL (e.g.,
http://testapi.gatefull.com:5057). - Click "Save" to create the environment.
Step 2: Create Additional Environments
You can add environments like Staging or Production by repeating the same process.
- Click the "Create" (or "+") button again.
- Fill in Description (e.g., "Staging"), Slug (e.g., "stg"), and Base Path.
- Click "Save" to create the environment.